Friday, January 15, 2016

Laundry room reveal! Lose the laundry room clutter part 2.

Well here it is the long awaited laundry room reveal!  

I didn't get all my projects done but I didn't want to wait to write this post!  The laundry room is soooo much better.  I actually "want" to wash some clothes.  I have noted a couple things as I am going through this decluttering process.  Don't let perfectionism get in your way!  It's better to do something than to do nothing because it can't be perfect!

Mary describes this perfectly in her recent blog post.  You can read it here: http://blog.maryorganizes.com/?s=perfectionism

Now to the good stuff!  Here are the before pictures.  I didn't want to post them but as a friend of mine said that's what people want to see.  The ugly truth!  The before pictures :) Basically a storage room.  And a bad one at that!  Things thrown in here haphazardly.  You can't even see my decorations!  Clean clothes unfolded and piled up.  Some of the messes are even from my kitchen reorganizing efforts.  Extra stuff was placed in here.  WELL....no more!


Afters!
My counter top is cleaned off and ready for me to fold clothes on.

I removed all the extra dog leashes.  Now there is only one.

A little motivational sign for my daughter!

A little clock I painted a  few years ago.  I couldn't bear to part with it
the cat in the picture is  Bonnie, she's crossed the rainbow bridge :(

I added a shelf above the dryer.  The box holds my dryer sheets make
one for yourself with these directions!
Dryer sheet box


I put the clothes rack here to hold hangers.  I hope to change this
someday soon.

A mural I painted.  My daughter added the little bird, bee and flowers.
I love it so much I couldn't paint over it!  The little pink dress
was one both my daughters wore as were the little pants.

A reminder on your way out the door :)


I cleaned out and reorganized the cabinets too.
I got rid of extra flashlights.  I  condensed and threw out pet supplies.  The
containers are from dollar tree.  I got rid of several glass containers and
vases.  I put all the light bulbs and bug sprays together.


Condensed and organized!

I hope this has inspired you to get your laundry room in tip top shape!  
Let me know in the comments!

Enjoy the journey and seize the day!
๑Ƹ̵̡Ӝ̵̨̄Ʒ๑*¨*• Barbara •.¸¸..๑Ƹ̵̡Ӝ̵̨̄Ʒ


Wednesday, January 13, 2016

So Sweet!! Valentines Day Dollar Store Crafts!

Did you know that they change the messages on the conversation hearts to match the times?  Every year they actually change the sayings?!  I thought that was a "cool" bit of trivia for you!  Read more about it at Candy hearts
To read about how they got the sayings in 2015 go here pugs and kittens
And to see how they are made visit this website Necco candy hearts

Today I have for you a couple of really easy Valentines day crafts.  I got most of my supplies from the dollar store.


For the first craft you will need:


  1. Coke glasses (I used the small ones, but the larger size would work also)
  2. Decorative paper.
  3. Low temp glue gun
  4. glue sticks
  5. carnation type artificial flowers
  6. foam hearts
  7. floral wire
  8. ribbon
  9. glitter
  10. glue
  11. pencil


1.First take your foam hearts and glue them together with a wire on the inside.  My wire was 5 inches long.  I took a heart put a small amount of glue on it layered the wire on and then put another heart over that.  Make sure to hold it while it dries.  This will be your cherry!


2.Now remove 3-4 blooms off of the stems.  I just gently pulled them off.  I used three but if you have a larger glass or you want a  fuller top you can use more.  I glued these together to form a larger bloom.  I  just glued the petals together in several places and I also put glue on the stem ends and tried to hold them together.


3.I wanted a little bling, so I put some glue on the tips of the petals and sprinkled clear glitter on them. You can brush the glue on with a paintbrush. The glitter I used looked like sugar, but you can use any type you like.  Make sure to let this dry before proceeding!


4.  I pushed the wire of the "cherry" into the flower and glued it in at the base.  After the glue dried I bent the wire around the base, or you could cut it off with wire cutters.


5.  I made a paper straw by cutting some craft paper into a 5x3 inch rectangle and wrapping it around a smooth pencil. ( Or you could use a real straw if you have one!).  After I got the paper all wound up in a cylinder shape I glued the edge down.  I then cut mine in half.  I used one for each "sundae".
I then put an ample amount of glue on one end of the straw and glued it into the flowers.


6.  Finally, I put glue around the rim of the glass and pushed my flower onto it.  I did have to hold some pressure in different spots around the rim of the glass to make it stick as the glue was drying.  Be careful not to burn your fingers.   I used a low-temp glue gun for this project.
7.  Add a ribbon bow if you would like!

How cute is this!!  It would be a great little teacher gift for Valentines day.


For the second craft you will need:

  1. Assorted candies of your choice.  I used Twizzlers, Conversation Hearts, Necco, and red hots.
  2. Graham Crackers
  3. Empty Tissue Box (square type)
  4. Low temp glue gun
  5. glue sticks
  6. craft paper
  7. marker
  8. cardboard or stiff paper
  9. Scissors
  10. Patience!  This craft was a little tricky but I love the results!
First I constructed a house out of graham crackers.  I glued the crackers together to form the sides.  Then I glued these to a tissue box.  I made a roof out of crackers and held it together as it dried.  after it dried I removed the roof and used it for a pattern to make the  inside triangles.  I traced the shape, cut it out with scissors and glued it to the crackers.  after this dried I glue the roof to the house.   I used twizzler candies to help hold it together and hide the seam. ( Frosting would also work for this if you have some and are handy with cake decorating!)
After I constructed the house I just began to decorate it with the candies.  It was so much fun to make and I love how it turned out!  Use your imagination and decorate it however you wish!  Just make sure the items aren't too heavy.

Glue two graham crackers together to form side walls.  I had to hold them together gently while the glue dried. 
Glue walls to the box.

An assortment of candies

Making the roof.  Trace the triangle to get the right shape.

Cut out the triangle.  Glue it into place on the roof.  I had to
trim the bottom of mine a bit to make it fit.
Front


Back


I hope you enjoyed today's craft!  It's back to the Laundry room tomorrow!  Please post pictures of your crafts on the facebook page or in the comments.  I would love to see what you've done!

Enjoy the journey and seize the day!
๑Ƹ̵̡Ӝ̵̨̄Ʒ๑*¨*• Barbara •.¸¸..๑Ƹ̵̡Ӝ̵̨̄Ʒ


Tuesday, January 12, 2016

Lose the Laundry room Clutter! Part 1

This week I am going to focus on the Laundry room.  It is so much easier to wash and dry clothes when you don't have to shift around clutter to manuever yourself around the room.  My laundry room is in the passthrough to the garage.  I have tried to decorate it to make it more pleasing.  However, it seems to be a good place to collect things I don't need.  I find that I throw a lot of things in here that I don't have a place for.  In fact it is more of a storage room than a laundry room.  Once something finds its way in here it never leaves!


The problems:

  1. I keep the door closed so I really don't look in the room very much, so I don't "see" the mess unless I go in there!
  2. The counter is covered with stuff so it is basically unusable. 
  3. There is no where to hang clothes.  I have hooks on the doors and they are always full of clothes.
  4. It's a small space.
  5. I have some storage containers that are not working for their purpose.  I have tried to have a mail center there with no success.  I will have to decide if I want to move it or repurpose the storage containers.  
  6. I empty my pockets prior to washing clothes and I have no place for the contents.
  7. I store tools and painting supplies in here and I don't always put them away properly.
  8. There is no place to fold clothes.
The good news:
  1. I can close the door when I wash clothes so I don't hear the washer.
  2. There is a counter in the room.
  3. The room is already decorated.
  4. There are a lot of cabinets.
Ideas:
  1. Install a hanging clothes rack or pull out drying line.
  2. Install some under cabinet lighting to brighten the space.
  3. Repurpose the storage containers.
  4. Possibly, install a folding table ( or maybe use the counter top)
  5. De-clutter the cabinets and counter top.
  6. Install shelving over my dryer for storage.
I am going to tackle this space and you are welcome to follow the journey.  I am going to begin with the cabinets.  Then the counter and finally the floor.  I am considering repainting it, but truthfully I still like the way it is decorated!  I just can't see it anymore because of all the junk and clutter!  After I  clear the space  I will decide if it needs to be redecorated.  Maybe I can just find a way to refresh it!

Enjoy the journey and seize the day!
๑Ƹ̵̡Ӝ̵̨̄Ʒ๑*¨*• Barbara •.¸¸..๑Ƹ̵̡Ӝ̵̨̄Ʒ


Sunday, January 10, 2016

Conversation Hearts Craft Ideas

I love conversation hearts, and with Valentine Day quickly approaching I thought I would share a few easy craft ideas with you.


For the first craft you will need:

  1. A 4" Styrofoam floral sphere
  2. Conversation heart candies
  3. A low temp glue gun
  4. Glue sticks
  5. Small glass candle holder
I started by gluing the Styrofoam sphere to the candle holder.  
If you wanted to you could paint the Styrofoam with a pastel colored acrylic paint.  I chose not to because I was in a hurry and wanted a quick craft!

I began by gluing the candies all around the base in rows.
I continued up the ball until it was covered.  I glued them on in a random order.  I think it added to the charm.  It took me 16 minutes to complete the sphere.  Isn't it cute!?


For the picture frame you will need:

  1. A picture frame.  I used a  very old wooden 8x10 frame that I had.  You can find these at the thrift store for very cheap.  Or buy one at the Dollar Store.
  2. Conversation heart candies.
  3. Low Temp glue gun.
  4. A photo for your frame.  I used a free printable from The girl creative. If you would like it visit her page and download the picture here:  Valentine Subway Free Printable
Frame and hearts.


For this craft I simply glued the hearts to the frame in rows.  It took me 16 minutes to complete this craft!


For the last craft you will need:

1. A glass container or vase. I made mine by gluing an ice cream pedestal dish to the bottom of a vase.  I turned the ice cream dish upside down and used E6000 glue to secure it to the vase.  I have had this vase for three years and it hasn't come apart yet, but do handle it carefully!
2.  A candle.
3.  Conversation hearts.

I hope you can see the ice cream
dish in this photo.
To complete this craft put the candle in the vase and surround it with the hearts!  Easy peasy and so cute!


I hope you enjoy these easy and cute Valentines day craft ideas!

Enjoy the journey and seize the day!
๑Ƹ̵̡Ӝ̵̨̄Ʒ๑*¨*• Barbara •.¸¸..๑Ƹ̵̡Ӝ̵̨̄Ʒ

Friday, January 8, 2016

It's not just me!

Yesterday I worked. I keep my work area clean and tidy.  Always.  But at home I just feel tired.  I feel like it doesn't matter.   When I get home from work at 8:00 PM I want to be finished. I want to rest. Last night when I got home from work I noticed some things.  The tables I worked at clearing off have collected a few misplaced items.  A small stack of mail has taken over a corner of my counter.  So I did something different.  I took the time to clear the mail pile.  Look at it, Shred it, Trash it....deal with it.  I cleared off the tables.  Am I tired?  Yes!  But now I can feel better about my space.

After dealing with the counter and table clutter, I finally sat down to look at the computer.  While perusing Face book  I came upon an ad for a 365 day space clearing plan.  Yes it's true, face book knows I am trying to de-clutter!  It has targeted me as a clutter bug!

Anyway, I click on the link and what do you know.  The lady with the 365 day plan has written a book.  Sounds good I think.  So I click on over to amazon, only to find out that the book is not in stock!  Well, this makes me feel awesome!  I am not alone in my clutter filled life.  Others are struggling with it too.  Probably a good thing this book is not available (more clutter!).
Some of us are living in the "land of excess",  paper plates that come in packs of 500 or 1000,  coupon clippers that have a stock-piles,  duplicates and disposables of all kinds.  Take bedsheets for example.  Back in the 1950-1960's  I would wager to say most people had one set per bed, maybe two.  Today there are summer sheets, flannel sheets, holiday sheets, colored sheets, whites sheets...well you get the idea.  All these things have to be stored somewhere.  And as we know your bed only needs one set of sheets...the ones you're sleeping on.  We will have to tackle that issue one day soon :)
This is just an example I know you could name many more.  I am declaring a war on all these extras in my home.  I am reclaiming my space and you should too!

I am following  a de-cluttering assignment plan I found online. One assignment is to get rid of extra kitchen utensils.  I took a look at my nifty rotating utensil holder and what do I see?  Spatulas!  Spatulas of all shapes and sizes, wooden, plastic and silicone.  Why?  Who could possibly need all these?  I made a bold (for me) move.  I removed a few.  I think I can live with that I thought.  I took out a few more. ( I got rid of 3 spatulas, a fork and a ladle.  Yes, definitely better to have less.  I put the extras in my give away box.  What do you think?
After
Before


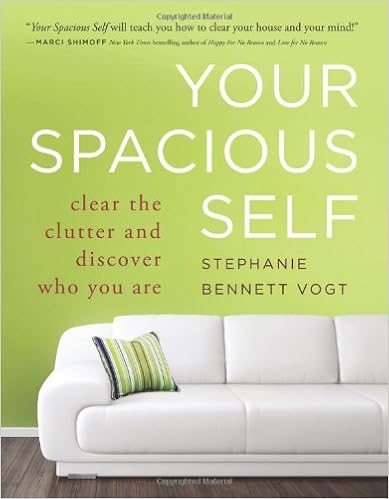
In case you are interested in the book that I was referring to click here


Here is another one.  If you have read any good books on the subject please let me know!
Visit the Facebook group page or leave me a comment here.

We are not alone!

Enjoy the journey and seize the day!
๑Ƹ̵̡Ӝ̵̨̄Ʒ๑*¨*• Barbara •.¸¸..๑Ƹ̵̡Ӝ̵̨̄Ʒ